Friday, June 23, 2023

Build Custom Operating System with OpenSUSE Build Service (OBS)

Access OBS here: https://build.opensuse.org

Create an account if necessary, and login.

Navigate to "Your Home Project". This should display your default project page.


Once there, you should by default be on the Overview tab. The context-based menu will have the option to create a "New Image".


The next step is to choose a base template - either an ISO or a container. Browse to the bottom to be familiar with the options available. The JeOS (Just Enough OS) provides the base minimum to get a server up and running.

Once you have the image selected, scroll to the bottom of the screen to name your custom OS.


With a name inserted, you can click "Create appliance". Note that this creates the sub-project and base files. A default build will also be initiated, but we still want to do some customising.

After creating the appliance, you will be taken to the sub-project / appliance overview.


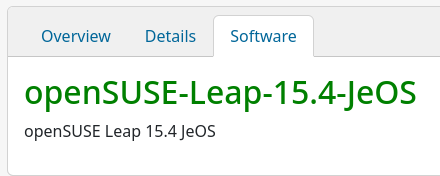
Under "Software", you can (1) choose the type of appliance files to be generated (VMware, Hyper-V, etc) and (2) add/remove software packages to be pre-installed.


Finding your image

From "Your Home Project", go to "Subprojects" to access the appliance.
Select your Custom OS under "Packages"


Once completed, you can "View Image" - where you can again edit the software packages and build types.


Adding software

When you are viewing your image, select the Software tab.


Under "Packages", select "Add package"


Start typing a package name to get the package search started.


Note that dependencies need to be manually specified. I normally run the base image as a virtual machine, and then with each zypper in package-name, note down the additional packages to be installed. These will need to be manually added in OBS.


Downloading images

After saving changes to build type or adding/removing software packages, a build is automatically scheduled. Follow it's status on the "Build results" box (you may need to click the "Refresh" button from time to time).

Click on the "images" hyperlink to view the appliance files.


Friday, May 5, 2023

Domain removal and CrowdStrike uninstall

Removing a server from a domain AFTER it has been removed from site is fairly simple - if you have the local Administrator password. If not, you will need to do the following:

  • Download Windows ADK and add PE (link1, link2)
    • Ensure the USB is not bigger than 32GB (link3)
  • Create a WinPE bootable USB (link1)
  • The idea is to replace the accessibility files with cmd.exe, so that you can run a command prompt without logging in.
    • If osk.exe in link1 does not work as desired, you can try replacing sethc.exe. This requires tapping shift 5x once booted (link4)
  • Once logged in and removed from the domain, remember to also reset group policy (link5)
    • If struggling to leave the domain, use the following command (link6):
netdom remove computername /Domain:domain /UserD:user /PasswordD:* /Force


There are a lot of posts regarding users struggling to uninstall CrowdStrike's client (Falcon). And it is really designed in a way to make un-installation impossible if you do not have the token. But with a server no longer on a network, most Sys Admins will not share the token. And the CrowdStrike client will block your attempts to uninstall it via the Control Panel.

However, in safe mode the Crowdstrike client does not run. So it cannot block you. But you also do not have access to the Control Panel's "Programs". So:
  1. Reboot in Safe Mode
  2. Locate the Package Cache containing the CrowdStrike client MSI package
    • C:\ProgramData\Package Cache\{looks - like - hexadecimal - strings }
    • One of them contains CsAgent.LionLanner.msi (either explore each one or do a search)
  3. Run privileged CMD (i.e., run as admin)
  4. Enable the MSI service:
    • REG ADD "HKLM\SYSTEM\CurrentControlSet\Control\SafeBoot\Minimal\MSIServer" /VE /T REG_SZ /F /D "Service"
    • REG ADD "HKLM\SYSTEM\CurrentControlSet\Control\SafeBoot\Network\MSIServer" /VE /T REG_SZ /F /D "Service"
    • net start msiserver
  5. Change to the directory containing CsAgent.LionLanner.msi. You should be able to use TAB-complete:
    • cd C:\ProgramData\Package Cache\{looks - like - hexadecimal - strings }
  6. Uninstall CrowdStrike endpoint:
    • msiexec.exe /x CsAgent.LionLanner.msi
  7. Reboot in normal mode, an duse Control Panel's "Programs" to now uninstall CrowdStrike Windows Sensor.
Moral of the story: it is alot easier if IT uninstall their apps before the hardware is taken off-site.