Friday, January 17, 2025

openSUSE Leap Micro on Digital Ocean

openSUSE's Leap Micro is a transaction-based operating system, providing built-in protection against updates that might cause the Operating System to fail. This protection is achieved by creating file system snapshots (BTRFS) before updates are applied. Further,as the "Micro" part suggests, it is lightweight and  focused on container and virtualisation use cases.

Using DigitalOcean's Custom Images feature, we can import the qcow image. 

Start by visiting https://get.opensuse.org/leapmicro, go to Downloads and copy the download link for Preconfigured Image (qcow).


In your DigitalOcean dashboard, navigate to Backups & Snapshots, and click on the Custom Images tab.


In the pop-up, paste the URL copied from the openSUSE Micro download page. Click Next and provide a more friendly name for the image, as well as setting the Distribution to be Unknown and the datatcenter where the the image must reside.


Wait for the Pending to change, and your image is ready to become an appliance.

When creating the droplet, select your image from the Custom Images tab. Also, the droplet size will need to have at least 50GB disk size. Under Authentication, only SSH is supported.


Now you can create the droplet. 


Since the image is being setup with cloud-init, the JeOS run-once menu will not be displayed. Connect using SSH: either as sles@public-ip, or root@public-ip. The 'sles' user has full sudo rights.

A big benefit of Leap Micro is that it performs system updates automatically. If you want to install packages, use sudo transactional-update -n pkg in git (the -n great for scripting as it ensures zypper is run in non-interactive mode). Note that you will need to do a reboot as soon as possible afterwards so that the snapshot created since installing the applications is used on start up and marked as reliable.

You can also enable Combustion to have an easy to use web interface for managing the server. You can find the instructions to do so by opening the droplet's console. You will need to:

  • Add a user for Combustion login, by running jeos-config user.
  • Enable 2FA, by running jeos-config otp.
  • Enabling the Combustion service with systemctl enable --now cockpit.service


There is a lot more to explore, and I recommend viewing the videos available from openSUSE. The last heads up is just that podman is provided in place of docker, by default. 


Friday, June 23, 2023

Build Custom Operating System with OpenSUSE Build Service (OBS)

Access OBS here: https://build.opensuse.org

Create an account if necessary, and login.

Navigate to "Your Home Project". This should display your default project page.


Once there, you should by default be on the Overview tab. The context-based menu will have the option to create a "New Image".


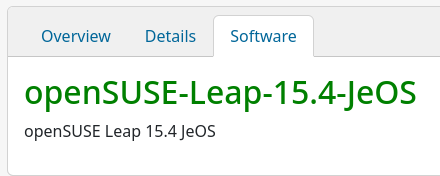
The next step is to choose a base template - either an ISO or a container. Browse to the bottom to be familiar with the options available. The JeOS (Just Enough OS) provides the base minimum to get a server up and running.

Once you have the image selected, scroll to the bottom of the screen to name your custom OS.


With a name inserted, you can click "Create appliance". Note that this creates the sub-project and base files. A default build will also be initiated, but we still want to do some customising.

After creating the appliance, you will be taken to the sub-project / appliance overview.


Under "Software", you can (1) choose the type of appliance files to be generated (VMware, Hyper-V, etc) and (2) add/remove software packages to be pre-installed.


Finding your image

From "Your Home Project", go to "Subprojects" to access the appliance.
Select your Custom OS under "Packages"


Once completed, you can "View Image" - where you can again edit the software packages and build types.


Adding software

When you are viewing your image, select the Software tab.


Under "Packages", select "Add package"


Start typing a package name to get the package search started.


Note that dependencies need to be manually specified. I normally run the base image as a virtual machine, and then with each zypper in package-name, note down the additional packages to be installed. These will need to be manually added in OBS.


Downloading images

After saving changes to build type or adding/removing software packages, a build is automatically scheduled. Follow it's status on the "Build results" box (you may need to click the "Refresh" button from time to time).

Click on the "images" hyperlink to view the appliance files.


Friday, May 5, 2023

Domain removal and CrowdStrike uninstall

Removing a server from a domain AFTER it has been removed from site is fairly simple - if you have the local Administrator password. If not, you will need to do the following:

  • Download Windows ADK and add PE (link1, link2)
    • Ensure the USB is not bigger than 32GB (link3)
  • Create a WinPE bootable USB (link1)
  • The idea is to replace the accessibility files with cmd.exe, so that you can run a command prompt without logging in.
    • If osk.exe in link1 does not work as desired, you can try replacing sethc.exe. This requires tapping shift 5x once booted (link4)
  • Once logged in and removed from the domain, remember to also reset group policy (link5)
    • If struggling to leave the domain, use the following command (link6):
netdom remove computername /Domain:domain /UserD:user /PasswordD:* /Force


There are a lot of posts regarding users struggling to uninstall CrowdStrike's client (Falcon). And it is really designed in a way to make un-installation impossible if you do not have the token. But with a server no longer on a network, most Sys Admins will not share the token. And the CrowdStrike client will block your attempts to uninstall it via the Control Panel.

However, in safe mode the Crowdstrike client does not run. So it cannot block you. But you also do not have access to the Control Panel's "Programs". So:
  1. Reboot in Safe Mode
  2. Locate the Package Cache containing the CrowdStrike client MSI package
    • C:\ProgramData\Package Cache\{looks - like - hexadecimal - strings }
    • One of them contains CsAgent.LionLanner.msi (either explore each one or do a search)
  3. Run privileged CMD (i.e., run as admin)
  4. Enable the MSI service:
    • REG ADD "HKLM\SYSTEM\CurrentControlSet\Control\SafeBoot\Minimal\MSIServer" /VE /T REG_SZ /F /D "Service"
    • REG ADD "HKLM\SYSTEM\CurrentControlSet\Control\SafeBoot\Network\MSIServer" /VE /T REG_SZ /F /D "Service"
    • net start msiserver
  5. Change to the directory containing CsAgent.LionLanner.msi. You should be able to use TAB-complete:
    • cd C:\ProgramData\Package Cache\{looks - like - hexadecimal - strings }
  6. Uninstall CrowdStrike endpoint:
    • msiexec.exe /x CsAgent.LionLanner.msi
  7. Reboot in normal mode, an duse Control Panel's "Programs" to now uninstall CrowdStrike Windows Sensor.
Moral of the story: it is alot easier if IT uninstall their apps before the hardware is taken off-site.

Tuesday, December 6, 2022

openSUSE Leap 15.3 and NVIDIA graphics on Acer Nitro 5

I recently found that the HDMI port on my Acer Nitro 5 would not work when using openSUSE, but worked fine in Windows. This is really just a graphical walk through of what is posted at:
  • https://en.opensuse.org/SDB:NVIDIA_drivers
  • https://en.opensuse.org/SDB:NVIDIA_SUSE_Prime
  • https://forums.opensuse.org/showthread.php/538877-optimus-laptop-and-leap-15-1-do-not-connect-to-external-hdmi-monitor/page3

Procedure

Confirm that multiversion is supported:
grep multiversion /etc/zypp/zypp.conf

You should see (or need to edit to change):


Next, add the NVIDIA repo:
zypper addrepo --refresh 'https://download.nvidia.com/opensuse/leap/$releasever' NVIDIA


Now we need to identify the correct graphics card model:
sudo lspci | grep VGA


You should see the standard graphcs controlle (e.g. Intel graphics), as well as the Nvidia graphics card. In this case, the GeForce RTX 3060.

Now for a bit of detective work. We need to identify the correct driver version, using Nvidia's driver search engine (link). Populate the search fields based on the model you have just positively identified using the previous step. For example:


From the output, you want the rather insignificant looking version:


Using the version information, we can search zypper for the correct driver:
sudo zypper se -s x11-video-nvidiaG0*


* 5 May 2023: The package names have subsequently changed for G06: 


To install, copy the name and do a normal zypper install. For example:
sudo zypper in x11-video-nvidiaG06 
sudo zypper in nvidia-video-G06

If you are using EFI and signed drivers, see the original links above for the extra steps.
Since this is on a laptop, we need to use the SUSE Prime tool to activate the Nvidia graphics as the chosen graphics. 

To activate the Nvidia graphics:
sudo prime-select nvidia

And to switch back to Intel graphics:
sudo prime-select intel

You will have to logout, maybe even restart.

Final comments

  • Enabling the Nvidia graphics got my HDMI output working
  • I also found the overall temperature of my laptop was reduced when using the Nvidia graphics over the Intel graphics
  • Another handy tool in nvidia-settings.


Wednesday, February 2, 2022

Quick and easy NTP server - Linux


When installing the MXONE, part of the setup requires testing the NTP server. This is a great way to ensure that the customer's site is truly prepared for all prerequisites. However, it can make advanced prep of systems - like SBN - really difficult. Here is an easy way to set your own Linux machine as an NTP server:

Edit /etc/chrony.conf. Below I have highlighted the entries that matter. Customise the allowed IPs to suit your purpose.


Next, remember to allow the NTP port (123 UDP) on your machine's firewall. On openSUSE using YaST:


References:
https://www.ibm.com/docs/en/db2/11.5?topic=suntp-setting-up-chrony-as-network-time-protocol-server-client-by-using-chronyd-linux


Wednesday, December 8, 2021

CPI docs of Mitel MXONE with Edge browser

Getting to view the CPI documentation for Mitel's MiVoice MXONE always has a challenge. My personal favourite is to just use a Python or Go web server. But here is a solution which works just as well, albeit less exotic:

1. Enable the "Internet Explorer mode button" in Edge by opening Edge's menu > Settings, and search "Internet explorer"


2.Following the link, and change the setting to "Allow":

3. Now right-click on Library Browser.htm and open with Edge.


4. The page will not open in the correct mode immediately. But from Edge's menu, select "Reload in Internet Explorer mode"


And now it should be working smooth. Follow the small pop-up's instructions to save the changes.

Monday, October 12, 2020

MVO400 OfficeSuite not connecting

 In this case, the client machine can:

  • Reach the OIP webserver's page
  • Reach the IIOP port (2809) and HTTP port (80) using telnet
  • OfficeSuite still fails and says it cannot connect to the server


After much struggling, it was noticed that the host name on the server itself resolves to an IPv6 Link-Local address. Removing IPv6 support on the interface and a reboot of the OIP server resulted in a working connection.

Addendum: Sometimes it is not so simple to disable IPv6. This link helped: https://tweaks.com/windows/40099/how-to-properly-disable-ipv6/